The hip hinge is a hip-dominant bend where you push your hips backward while keeping your spine neutral, loading your glutes and hamstrings instead of your lower back. It is the foundation of safe lifting, squatting and bending, and once you can feel it, you can apply it to almost every strength exercise you do. Below we break down the setup, the common faults, and the drills that build the pattern from scratch.
TL;DR:
- Keep the descent to a hamstring stretch, with your knees softly bent and spine neutral; forcing extra depth by rounding your back defeats the movement.
- Use wall taps to teach your hips to travel backward, then hold a dowel against your head, upper back, and tailbone to check spinal position.
- Progress from bodyweight hinges to light deadlifts only when control is pain free; start with 3 to 4 sets of 6 to 10 reps.
- Schedule hinge work twice weekly alongside squats; older adults and people returning from back problems should use frequent, low load practice.
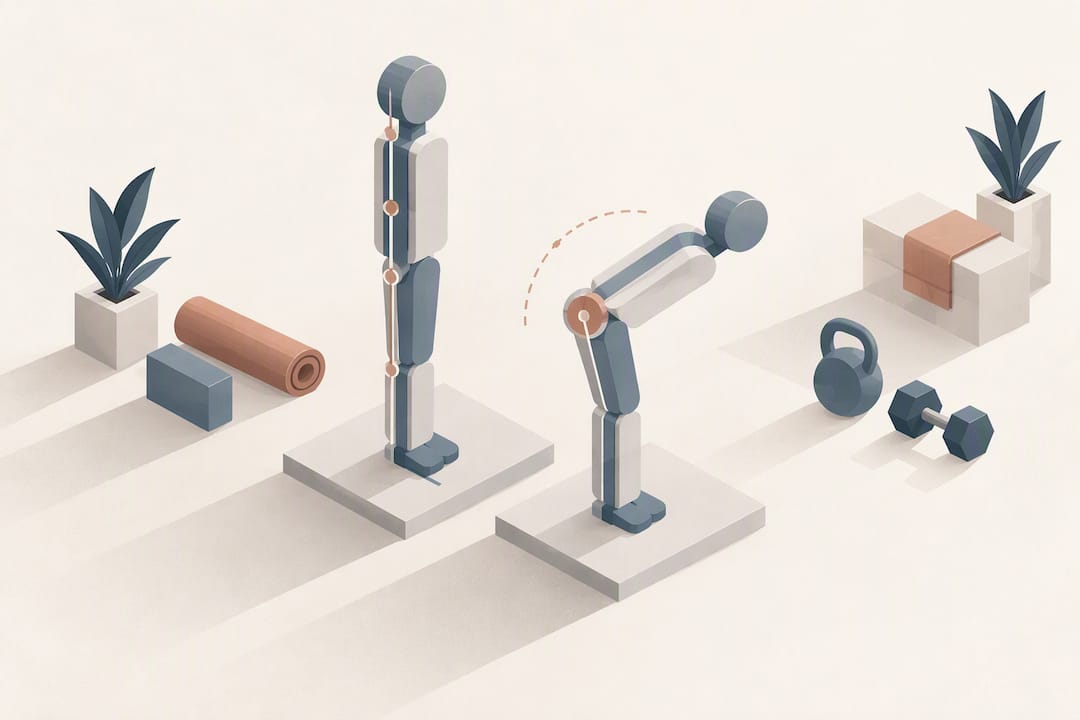
A hip hinge happens whenever you fold forward from the hips rather than the waist, with your knees softly bent and your spine staying in roughly the same neutral shape throughout the movement. You already do a rough version of it every time you pick something off the floor, load a dishwasher or lean into a car boot. The difference between a good hinge and a bad one usually comes down to where the movement happens: at the hips, or at the lower back.
Clinical rehabilitation programmes lean on this distinction heavily. NHS patient advice sheets use hinge-based movements such as the Romanian deadlift and the straight-leg deadlift as core exercises for strengthening the lower back, precisely because they train the hips and posterior chain to do the work that the spine often gets stuck doing instead.
Learning the pattern properly brings a few clear benefits:
The hip hinge is primarily a posterior chain exercise, meaning it targets the muscles running down the back of your body.
Your stance width and the type of load you use can shift the emphasis between these muscles. A biomechanical analysis of the barbell hip thrust found it produces greater demand on the hip extensors compared with other joints, which is one reason coaches often pair a hinge variation like the deadlift with a hip thrust: one loads the hips more in the early part of the movement, the other more at the top.
Getting the hinge right is less about strength and more about sequencing. Follow these steps in order, and resist the urge to rush the early stages.
A few drills make this sequence much easier to feel:
Pro Tip: Stop the descent the moment you feel a stretch in your hamstrings rather than trying to reach further down. Forcing extra range by rounding your back defeats the purpose of the exercise.
Clinical guidance echoes this: patient advice sheets describing straight-leg deadlift progressions specifically caution against forcing depth beyond a comfortable hamstring stretch, since the goal is a controlled range, not a maximal one.
Most hinge faults fall into one of a handful of categories, and each has a straightforward fix.
Pro Tip: Film yourself from the side during practice. A side-on video makes it far easier to spot rounding or a squat pattern than trying to feel it in the moment.
A few short drills, done consistently, make the hinge pattern click much faster than attempting heavier hinges alone.
Run through two or three of these as a short warm-up before any hinge-focused session.
Building the hinge pattern works best as a ladder, where you only add load or range once the previous stage feels controlled and pain-free.
A beginner, therapeutic-style session might include 3 to 4 sets of 6 to 10 reps of a bodyweight or lightly loaded hinge, which mirrors the starting volumes used in NHS rehabilitation leaflets for lower-back strengthening, adjusted according to how your back responds afterwards.
An intermediate strength session might use 4 sets of 5 to 8 reps of a loaded RDL or deadlift, with a slower three-second lowering phase to build control under heavier weight. Interestingly, a 2023 study on movement mechanics found that carrying typical external loads such as a duty belt did not significantly change muscle activity during bodyweight hinge tasks, suggesting the pattern itself stays stable even as load is introduced gradually.

The simplest readiness check is pain and control: if a session leaves you sore in a way that fades within a couple of hours, you are generally fine to continue progressing. If discomfort lingers longer, drop back a stage and rebuild from there.
Within our small group personal training sessions, we build the hinge pattern the same way for every member, starting with wall taps and stick cues before any load is added. For some members, we often spend several sessions on bodyweight regressions alone, since movement quality matters more at this stage than how much weight is on the bar.
Our coaches watch for the same faults covered above: a rounding back, knees travelling too far forward, or hips that barely move. We adjust load and range session by session based on how each member reports feeling, rather than following a fixed script. That member-centred approach sits behind what we have seen across multiple members and workouts: steady, sustainable progress rather than rushed loading.

Hinge work earns a regular place in most training weeks, not just an occasional slot. For general strength and injury prevention, two sessions a week that include some hinge variation, whether a deadlift, RDL or simple bodyweight drill, is usually enough to keep the pattern sharp.
For older adults and anyone returning from a back issue, we favour frequent, low-load hinge practice folded into normal training rather than one heavy session. This keeps the movement pattern fresh without creating unnecessary fatigue. For younger athletes or return-to-play clients, hinge strength underpins sprinting and jumping mechanics, so it often sits alongside squat work rather than replacing it. Neither pattern should be dropped in favour of the other: squats and hinges train the same muscles from different angles, and a balanced week usually includes both.
The biggest misjudgement in most training plans is treating the hinge as a warm-up movement rather than a main lift. Done properly and loaded appropriately, it builds as much strength and resilience as any squat variation, and for many people with back concerns, it does so more safely.
— Vitalij
Learning the hinge from a video or an article only gets you so far: a coach watching your setup in real time catches the small faults that are hard to see yourself, like a hip that stalls early or a back that rounds under fatigue. Our Small Group PT sessions in Sheffield build this kind of individualised coaching into every class, with trainers who adjust load, range and cueing to where each member actually is, not a generic script.
If you are easing back into training after forty or coming back from a back issue, that session-by-session feedback is what turns a tentative hinge into a confident, loaded deadlift over time. For parents looking to build the same movement foundations in younger athletes, our SpeedAcademy and SuperStrong programmes apply the same progressive coaching to speed, strength and power work.
Get in touch to find a small group session that fits your schedule and current level, and let a coach take the guesswork out of your hinge.
Push your hips straight back while keeping your knees softly bent and your spine neutral, letting your torso tip forward as a result of the hip movement rather than bending at the waist. Stop the descent once you feel a stretch through your hamstrings, then drive your hips forward and squeeze your glutes to stand back up.
Hip hinge exercises build strength through the glutes, hamstrings and spinal muscles while training your body to lift and bend without straining your lower back. NHS patient advice sheets use hinge-based moves like the Romanian deadlift for lower-back strengthening programmes, reflecting their role in both performance and rehabilitation.
Limited hip or hamstring mobility is a common reason the hinge feels difficult, often showing up as tightness well before you reach a useful range of motion. Weak glute activation or simply not understanding the movement pattern are other common causes, both of which improve with regression drills like wall taps and stick-cued hinges before adding load.
No, they are different movement patterns that train similar muscles from different angles. A hinge involves the hips travelling backward with minimal knee movement, while a squat involves the knees bending forward significantly alongside the hips, and most balanced training plans include both.